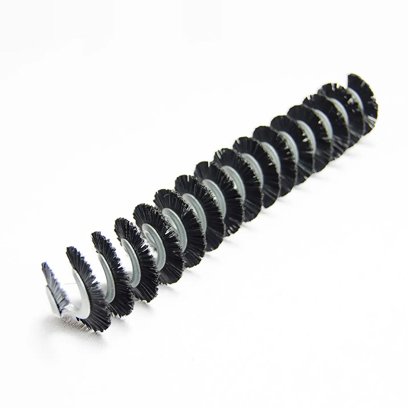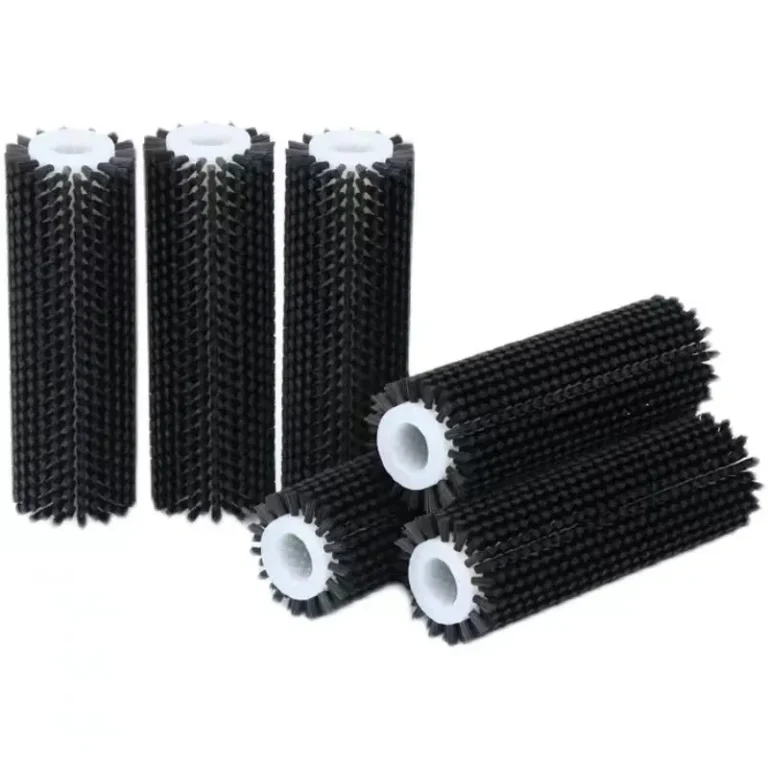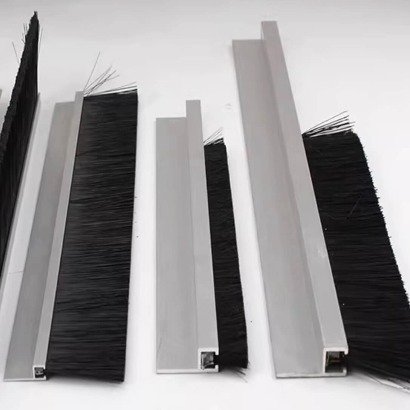


Are you ready to achieve spotless floors with a floor scrubber brush? It is essential to follow a few key steps to ensure the best results. One of the most common mistakes is neglecting to sweep away dirt before using your floor scrubber brush. Others may overlook stains prior to cleaning, or use the incorrect cleaning solution, or even apply too much, which can cause damage to your flooring. Proper maintenance of your floor scrubber brush is also crucial, as is setting the machine correctly for the task at hand. Safety should never be ignored—always mark wet floors and adhere to safety guidelines. Whether you are using a nylon floor cleaning brush at home or are familiar with all the floor scrubber brush uses in a professional setting, adopting these good habits will help you achieve optimal cleaning results.
-
Common mistakes to avoid:
-
Failing to prepare the floor beforehand
-
Using the wrong type or excessive amount of cleaning chemicals
-
Neglecting to maintain the floor scrubber brush
-
Incorrectly utilising the features of the scrubber
-
Overlooking important safety measures
-
Key Takeaways
-
Always get your floor ready by picking up rubbish, looking for any damage, and getting the right tools before you start scrubbing.
-
Pick the right brush type and how hard it is for your floor. This helps stop damage and gives the best clean.
-
Use the right cleaning solution and the correct amount. Make sure it matches your floor and follow safety rules.
-
Move the scrubber slowly with overlapping lines. Change the settings to fit your floor and how dirty it is for a good clean.
-
Clean and check your brush and machine after every use. Store them the right way to help them last longer and work well.
Preparation
Remove Debris
Before you start scrubbing, you need to clear the area. Move any furniture, rugs, or cables out of the way. This gives you space to work and helps you avoid missing spots. Next, sweep or vacuum the floor. Loose dirt and dust can scratch your floor or get stuck in the scrubber brush. If you leave debris behind, it can turn into mud when wet, making cleaning much harder. Sticky bits like gum or dried food should be scraped off with a putty knife or scraper. You want a smooth surface before you begin.
Tip: Always put up wet floor signs before you start. This keeps everyone safe and helps prevent slips.
Inspect Floor
Take a good look at the floor. Check for any damage, like cracks or loose tiles. If you spot anything, fix it before you clean. Damaged areas can get worse if you run a heavy machine over them. Also, look for stains or sticky patches. These might need extra attention or a different cleaning solution. Make sure the floor is dry after sweeping, so you don’t create slippery mud when you start scrubbing.
-
Scrape off gum or sticky spots.
-
Check for cracks or loose tiles.
-
Make sure the floor is dry and clear.
Gather Equipment
Now, get your gear ready. You’ll need the floor scrubber brush, the right cleaning solution, and any personal protective equipment (PPE) like gloves or goggles. Make sure the scrubber’s battery is fully charged if it’s cordless. Double-check that all parts are attached and working. Test the controls and make sure you know how to use them. If you’re not sure, take a minute to read the manual or ask for help.
Checklist for equipment:
-
Floor scrubber brush and attachments
-
Cleaning solution suitable for your floor
-
PPE (gloves, goggles, ear protection)
-
Wet floor signs
-
Fully charged battery or power cord
-
Scraper for sticky spots
Proper preparation helps you clean faster, keeps your machine in good shape, and makes the whole job safer for everyone.
Floor Scrubber Brush Selection
Floor Scrubber Brush Uses
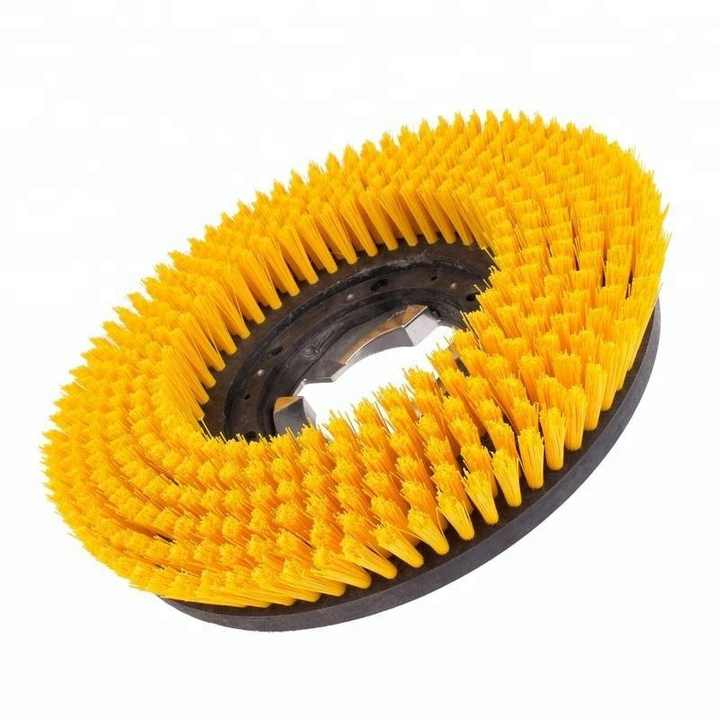
There are many kinds of floor scrubber brushes. Each brush does a different job. Some brushes clean smooth floors. Others work on rough or bumpy surfaces. You must choose the right brush for your floor. If you clean tile, concrete, or hardwood, pick the correct brush.
Here are some common floor scrubber brush uses:
-
General scrubbing brushes clean vinyl, ceramic tile, polished concrete, and epoxy floors.
-
Gritted brushes are strong. Use them for bare concrete or very dirty floors.
-
Nylon brushes clean ceramic tile and grout. They remove tough dirt but do not scratch.
-
Aggressive restoration brushes take off old finishes and get concrete ready for new coatings.
-
Soft brushes are gentle. Use them on finished hardwood or delicate floors to stop damage.
Tip: Always read the manufacturer’s guide for your floor. This helps you avoid scratches or damage.
Here is a table to match brush types with floor surfaces:
|
Brush Type |
Suitable Floor Surfaces |
Characteristics and Use Cases |
|---|---|---|
|
General Scrubbing Brushes |
LVT, Ceramic Tile, Polished Concrete, VCT, Epoxy |
All-purpose brushes included with machines, suitable for a wide range of floors. |
|
Gritted Brushes |
Bare Concrete |
Aggressive cleaning for heavily soiled floors and uneven surfaces; available in different grit levels. |
|
Nylon Brushes |
Ceramic Tile, Grout, Abrasion-resistant floors |
Moderate abrasiveness; effective for grout lines and tough debris; versatile across many environments. |
|
Aggressive Restoration Brushes |
Concrete, Floors needing restoration |
Designed for removing old finishes, resurfacing concrete, and preparing floors for new coatings. |
|
Soft Brushes for Finished Floors |
Finished hardwood and delicate floors |
Gentle cleaning power for floors that require non-abrasive treatment. |
Choose the Right Floor Scrubber Brush
Picking the right brush is important for good cleaning. Think about your floor and how dirty it is. Using the wrong brush can scratch the floor or leave dirt behind.
Let’s look at your choices:
-
Soft nylon brushes are best for delicate floors like wood, vinyl, or marble. They keep floors shiny and stop scratches.
-
Polypropylene brushes are harder. Use them for rough or bumpy floors, like tile or stone. They clean dirt but do not harm the surface.
-
Gritted brushes are the strongest. They clean concrete and remove heavy stains. Do not use them on soft or shiny floors.
-
Wire brushes are for very tough jobs, like taking off old coatings from concrete. Never use them on wood or finished floors.
Here is a table showing how bristle stiffness changes cleaning:
|
Bristle Material |
Stiffness & Properties |
Suitable Floor Types & Cleaning Impact |
|---|---|---|
|
Soft Nylon |
Softest bristles, flexible, gentle on surfaces |
Ideal for delicate floors like wood and vinyl; prevents scratching and maintains shine |
|
Polypropylene |
Stiffer, more aggressive than nylon |
Effective for rough or textured floors such as tile and stone; good for general scrubbing |
|
Gritted Bristles |
Polypropylene with abrasive grit, very stiff |
Heavy-duty scrubbing on concrete and tough dirt; can damage delicate floors |
|
Wire Bristles |
Most aggressive and stiff |
Best for rough concrete and heavy-duty stripping; very abrasive, not for delicate floors |
|
Natural Fibre |
Softest, least aggressive |
Used mainly for polishing hard surfaces; minimal abrasion |
Bristle stiffness is important. Thick bristles scrub harder but can scratch soft floors. Soft bristles clean gently and keep floors looking nice. If you are unsure, start with a soft brush and test a small spot.
Note: Pads are another choice. Pads clean and polish smooth floors quickly and evenly. They cost less and are easy to swap. Brushes last longer and work better on rough floors, like tile grout or rough concrete. Pads are good for flat floors. Brushes clean tough dirt and cracks.
Here is a quick comparison:
|
Feature |
Pads |
Brushes |
|---|---|---|
|
Cost |
More cost-effective initially; budget-friendly |
Higher initial cost but longer lifespan |
|
Durability |
Shorter lifespan; wear out quickly on rough or uneven surfaces |
More durable, especially on rough or uneven surfaces |
|
Surface Suitability |
Best for smooth, flat floors; not suitable for textured or uneven floors |
Suitable for rough, textured floors and can reach grout lines and crevices |
|
Cleaning Performance |
Provide uniform cleaning and polishing; maintain consistent results throughout life |
Effective on stubborn dirt; variety of bristle types for different floor types |
|
Environmental Impact |
Pads need frequent replacement, generating more waste |
More environmentally sustainable due to longevity |
|
Ease of Use |
Easier to change; colour-coded system indicates abrasiveness |
May require different brushes for different surfaces; more labour to maintain |
|
Floor Damage Risk |
Can damage floors if worn and not replaced timely |
Generally gentler on rough floors but must choose appropriate bristle stiffness |
|
Applications |
Ideal for smooth floors like terrazzo, VCT, marble, and finished floors |
Ideal for concrete, tile grout, epoxy non-slip, rubber floors, and heavily soiled areas |
Attach Brush Securely
After you pick your brush, attach it the right way. A loose brush can hurt your floor or the machine. Always check the brush is locked before you start cleaning. If you use a pad, make sure it sits flat on the pad driver.
Here is a simple checklist for attaching your brush or pad:
-
Turn off the machine and unplug it.
-
Line up the brush or pad with the driver plate.
-
Push the brush until it clicks or locks in place.
-
Spin the brush by hand to check it’s secure.
-
Plug in the machine and test the controls.
Alert: Never force a brush onto the machine. If it does not fit, you may have the wrong type. Check your manual or ask a supplier for help.
Check your brush often for damage. Replace it if the bristles look worn or uneven. This keeps cleaning results good and protects your floors.
Cleaning Solution
Select Solution
Picking the right cleaning solution is very important. You want your floors clean and safe from harm. Most floors do well with a neutral pH cleaner. This cleaner takes away dirt and grease but does not hurt the finish. If you work in a kitchen or busy shop, use a heavy-duty degreaser. It removes grease and oil fast. In hospitals or food places, a disinfectant is best. It kills germs and keeps people safe. Always check your solution matches your floor and scrubber machine.
Here’s a quick guide to help you choose:
|
Floor Material |
Recommended Solution |
Notes |
|---|---|---|
|
Shiny Tiles |
Neutral pH Cleaner |
Keeps shine, cleans grout |
|
Concrete |
Heavy-Duty Degreaser |
Removes tough stains |
|
Timber (Gloss) |
Gentle Neutral Cleaner |
Protects finish |
|
Rubber |
Mild Detergent |
Reduces wear, gentle on surface |
|
Healthcare Areas |
Disinfectant/Sanitiser |
Kills bacteria and viruses |
Tip: Test your solution on a hidden spot first. This helps you avoid damage or streaks.
Measure and Add
You must mix the cleaner the right way. Too much cleaner leaves sticky marks and can harm your brush. Too little means you work harder and waste time. Always read the label for the right amount to use. Most neutral cleaners need water added. For tough jobs, use a stronger mix. For daily cleaning, use less.
-
Fill the tank with water first.
-
Add the cleaning solution slowly.
-
Use low-foaming detergents to stop too many bubbles.
-
Check the dilution chart below for common ratios:
|
Cleaning Type |
Dilution Ratio |
|---|---|
|
Heavy-duty |
1:10 to 1:20 |
|
General cleaning |
1:32 to 1:64 |
|
Daily maintenance |
1:128 to 1:256 |
|
Light-duty |
1:512 to 1:1024 |
Note: Mixing the right way saves money and helps the environment. Chemical dosing stations can make this easier.
Follow Guidelines
Safety is always important. Wear gloves and eye protection when using chemicals. Non-slip shoes help you stay safe on wet floors. Read the instructions and safety sheets before you start. Make sure the area is clear and put up wet floor signs. Pour water into the tank before adding detergent. Close the tank tightly to stop spills.
-
Use PPE: gloves, goggles, long trousers.
-
Mix chemicals in a space with fresh air.
-
Throw away leftover solution safely.
-
Clean brushes after use to remove any left-over cleaner.
Eco-friendly cleaners, like plant-based or enzyme products, help the planet. Floor scrubbers often need less chemical, so there is less waste and safer floors for everyone.
Operation
Plan Path
Before you start, take a moment to plan your cleaning route. Look at the room and decide where you want to begin and end. Start at the farthest point from the exit. This way, you will not walk over areas you have just cleaned. Move any obstacles out of your way. If you work in a busy place, use warning signs or tape to keep people safe and away from wet floors.
Tip: Work in straight lines or a gentle zigzag. This helps you cover every spot and makes your job easier.
If you clean a large area, break it into smaller sections. Clean one section at a time. This method helps you avoid missing spots and keeps your work neat.
Adjust Settings
Now, set up your machine for the best results. Most floor scrubbers let you change brush speed, water flow, and vacuum power. Adjust these settings to match your floor and how dirty it is. For example, use a slower brush speed and more water for tough dirt. Use less water and a gentle speed for delicate floors.
Here are some settings you might find on your machine:
-
Adjustable brush speed for different floor types
-
Vacuum power settings to pick up water and dirt
-
Eco mode to save energy and reduce noise
-
Water flow controls to use just enough liquid
-
Squeegee position for better water recovery
If your machine has sensors or safety boards, make sure they work. These features can stop the machine if something goes wrong. Always check that the squeegee sits flat behind the brush. This helps pick up water, even when you turn.
Note: Wear gloves and non-slip shoes. Check your machine for loose parts or leaks before you start.
Scrubbing Technique
When you use a floor scrubber brush, your technique matters. Move the machine slowly and steadily. Let the brush do the work. Do not push down too hard. Too much pressure can damage the floor or wear out the brush. Too little pressure will not clean well.
Use gentle, circular motions if you scrub by hand. For machines, guide the scrubber in straight lines. Overlap each pass a little to make sure you do not miss any spots. If you see a stubborn stain, go over it again with a bit more pressure or a slower speed.
-
Adjust brush pressure to match the floor and dirt level.
-
Use enough water to loosen dirt, but not so much that the floor stays wet.
-
Check that water flows from the tank. If not, look for blockages or refill the tank.
-
Keep an eye on the recovery tank. Empty it before it gets too full.
Callout: If your brush drags or leaves marks, stop and check for tangled debris or worn bristles. Make sure the brush is locked in place and not bent.
Overlapping Passes
To get the best results, always make overlapping passes. Each time you move the machine, cover a bit of the area you just cleaned. This method stops streaks and missed spots. It also helps you pick up all the dirty water.
Here’s a simple way to remember:
-
Start at one edge of the room.
-
Move the scrubber in a straight line.
-
On your next pass, overlap the last line by about 10-20 cm.
-
Keep going until you finish the whole area.
If you notice uneven cleaning, check your brush and settings. Sometimes, a worn brush or wrong pressure can cause problems. Regular checks and good technique will give you a clean, shiny floor every time.
Tip: After you finish, let the floor dry completely. Use fans or open windows if you can. This step helps prevent slips and keeps the floor looking its best.
You now know how to get the most from your machine and understand the main floor scrubber brush uses. With the right path, settings, and technique, you will achieve a spotless floor safely and efficiently.
Maintenance
Clean Brush
You want your floor scrubber brush to last as long as possible. After every use, take a few minutes to clean it. Rinse the brush under running water to remove dirt, hair, and cleaning solution. Use a stiff brush or gloved hand to pull out any debris stuck between the bristles. If you leave dirt in the brush, it can harden and reduce cleaning power next time.
Tip: Clean the brush straight after use. This stops mildew and keeps the bristles in good shape.
Regular cleaning also helps you spot early signs of wear. If you notice bristles that are frayed or shorter than half an inch, it’s time to replace the brush. Keeping a few spare brushes on hand means you can swap them quickly and avoid downtime.
-
Rinse thoroughly after each use
-
Remove tangled debris
-
Check for wear and replace if needed
Inspect Machine
A quick check of your machine keeps it running smoothly. Look over the brushes, squeegees, and filters after every cleaning session. Make sure nothing is clogged or damaged. Rotate your brushes regularly so they wear evenly. This simple habit extends their life and keeps cleaning results consistent.
Follow a routine maintenance schedule. Check belts, hoses, and fittings for any signs of damage. Tighten loose parts and replace anything worn out. If you look after your machine, you avoid costly repairs and keep your floors spotless.
-
Inspect brushes and pads for wear
-
Rotate brushes for even use
-
Check hoses, belts, and filters
-
Follow the manufacturer’s maintenance plan
Store Properly
Proper storage protects your brushes and machine. Always remove the brush or pad driver before storing the scrubber. Wash the brush and let it dry completely. Never leave brushes sitting on the ground, as this can flatten bristles and cause contamination. Hang them up or place them on a clean shelf.
Note: Storing brushes off the floor keeps them in shape and ready for the next job.
Keep your machine in a dry, well-ventilated area. This prevents rust and keeps electrical parts safe. Replace any pads that look torn or worn out. Good storage habits help your equipment last longer and work better every time you clean.
You now know the main steps for clean floors. First, get the area ready. Next, choose the right brush and cleaning solution. Then, use the best cleaning method. Always look after your equipment. Experts say looking after your brush and picking the right one really helps. Here is a simple table to help you remember:
|
Aspect |
Brushes (e.g., for rough floors) |
Pads (e.g., for smooth floors) |
|---|---|---|
|
Cleaning Effect |
Cleans deeply and very well |
Good for light cleaning and polishing |
|
Durability |
Stays good for longer |
Wears out more quickly |
If you follow these tips, your floor scrubber brush will always work well.
FAQ
How often should you replace a floor scrubber brush?
You should check your brush after each use. If the bristles look worn, frayed, or shorter than half an inch, swap it for a new one. Regular checks keep your cleaning results top-notch.
Can you use any cleaning solution with a floor scrubber brush?
No, you need to pick a solution that matches your floor type and machine. Always read the label and test on a hidden spot first. Some chemicals can damage certain floors or brushes.
What should you do if the brush leaves streaks or misses spots?
Try overlapping your passes and slow down the machine. Check the brush for tangled debris or wear. Adjust the pressure and make sure the brush sits flat on the floor.
Is it safe to use a floor scrubber brush on hardwood floors?
You can use a soft nylon brush and a gentle cleaner on finished hardwood. Avoid stiff or gritted brushes. Always test in a small area first to prevent scratches.