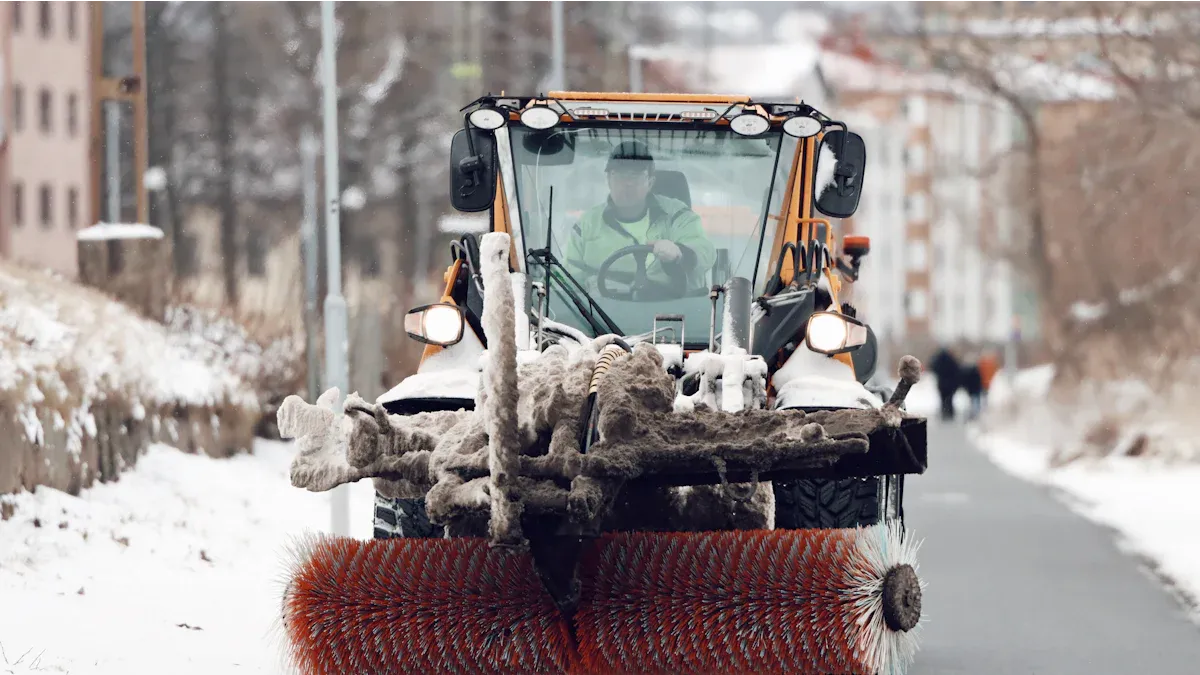
Using a snow sweeper brush safely is not just about moving snow. Many new users make mistakes. They do not think about how comfortable the brush is to use. Some forget to store the brush in the right way. People often see that snow sweeper brushes choices last longer.
Key Takeaways
- Selection: Choose the correct snow sweeper brush based on size, bristle type, and compatibility with your vehicle or equipment
- Safety: Always follow operational safety rules, wear protective gear, clear the work area, and verify machine settings before starting
- Inspection: Check brush condition regularly to identify damage early and maintain optimal cleaning performance
- Maintenance: Clean and store brushes properly to extend service life and reduce costly downtime
- Replacement: Replace worn brushes promptly to ensure safe and effective snow removal operations
Snow Sweeper Brush Basics
Uses
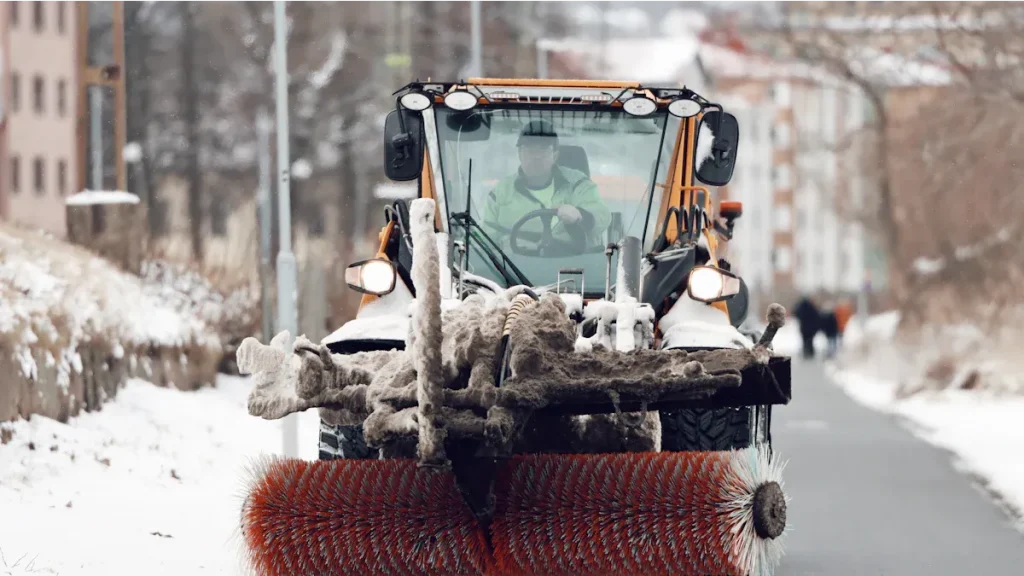
A snow sweeper brush helps people get rid of snow. People use it on roads, pavements, car parks, and airport runways. The brush works well in cold weather. It has strong nylon filaments or stainless steel wire. These materials do not break easily. People put the brush on machines like road sweepers and truck ploughs. It also fits municipal vehicles. The brush takes away thick snow. This makes travel safer for everyone. It moves fast and can clean big areas. The bristles are soft and do not scratch concrete, asphalt, or brick. People like that the brush lasts a long time. It does not need much care.
Tip: Always look at the brush before you use it. Check if the bristles are worn out. This helps keep snow removal safe and works well.
-
Main jobs of a snow sweeper brush:
-
Clears snow from roads, pavements, and car parks
-
Works with many snow removal machines
-
Takes away thick snow for safer travel
-
Keeps surfaces safe from damage
-
Lasts long and needs little care
-
Types
People can pick from many snow sweeper brush types. Each type is best for certain jobs and snow. Here is a table with some common types and what they do:
|
Brush Type |
Key Features |
Best Application / Snow Condition |
|---|---|---|
|
One-Piece Short Handle Brush |
Small size, soft bristles, ice scraper end |
Light snow, small vehicles |
|
Telescopic Snow Brush |
Handle can get longer for more reach |
Big vehicles, hard-to-reach places |
|
Premium Multi-Function Brush |
Rotating head, strong materials, long handle |
Heavy snow, SUVs, trucks, used often |
|
Snow Brooms |
Big brush head, handle gets longer, light |
Heavy snow, big vehicle surfaces |
|
Heavy-Duty Ice Scrapers |
Strong blades, comfy handles |
Thick ice, very cold weather |
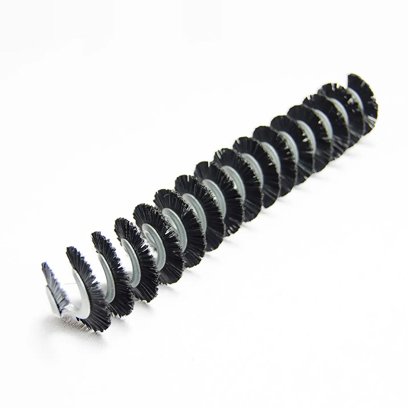
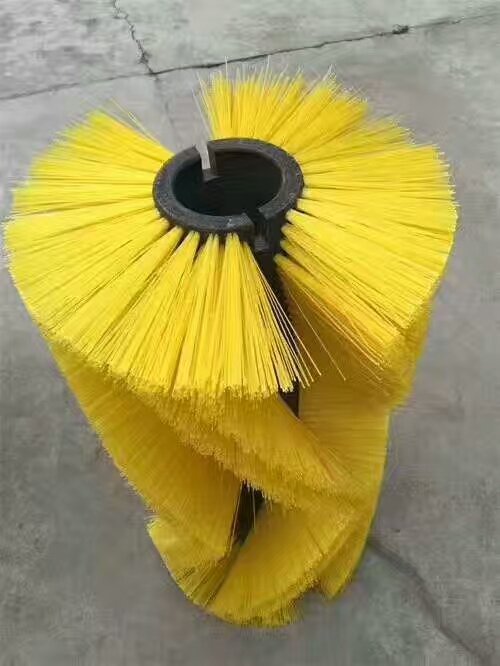
Good brushes use strong plastic and soft bristles. Some have foam grips to make them comfy. Handles that get longer and heads that turn help people reach more places. They also clear snow faster. Wafer sweeper brushes have tough bristles and a strong base. They are good for long, hard jobs and keep the road safe.
Snow Sweeper Brush Safe Use
Preparation
Before anyone starts using a snow sweeper brush, they should always read the operator’s manual. The manual gives clear instructions and shows all safety decals. These guides help users understand the machine and avoid mistakes. People should check that all safety guards and protective devices are in place. They need to look at the area where they plan to work. Remove any stones, sticks, or rubbish. These objects can damage the brush or fly out and hurt someone.
It is important to check the broom height and pressure settings. If the broom sits too low or too high, it will not clean well. Too much pressure wears out the bristles quickly. Too little pressure leaves snow behind. The table below shows what can happen if the settings are wrong:
|
Issue |
Cause |
Effect on Performance |
|---|---|---|
|
Uneven Sweeping Patterns |
Uneven broom wear or wrong adjustments |
Uneven brush wear, less cleaning power |
|
Reduced Debris Pickup |
Worn bristles or wrong down-pressure |
Less debris picked up, more work needed |
|
Excessive Noise/Vibration |
Damaged parts or loose mounting |
Possible damage, less efficient cleaning |
Tip: Always use the settings recommended by the manufacturer. This helps the brush last longer and keeps cleaning strong.
Operation
When operating a snow sweeper brush, users should wear the right protective clothing. Safety glasses or shields protect eyes from flying debris. Hearing protection keeps ears safe from loud noise. Sturdy, slip-resistant boots help prevent falls. Dust masks can help if the air is full of fine snow or dust.
People should keep the area clear of others, especially children and pets. Never let anyone stand near the machine while it is running. Operators must keep hands and feet away from moving parts. They should walk, not run, and keep a firm grip on the handles. It is best to avoid using the brush on roofs or steep slopes. If the ground is icy or sloped, move slowly and carefully.
After finishing the job, let the machine run for a short time. This helps clear out any snow or water and stops the parts from freezing up.
Safety Tips
Staying safe with a snow sweeper brush means following a few simple rules:
-
Always wear eye and hearing protection.
-
Keep the work area clear of people and pets.
-
Inspect the area and remove foreign objects before starting.
-
Never put hands or feet near rotating parts.
-
Do not direct the discharge at anyone.
-
Shut off the engine and remove the key before doing any maintenance or clearing clogs.
-
Use only attachments approved by the manufacturer.
-
Handle fuel with care and fill up outdoors.
-
Avoid using the machine indoors for long periods.
-
Walk, never run, and keep good footing.
-
Be extra careful on slopes and slippery surfaces.
-
If the machine hits something or starts to vibrate, stop and check it straight away.
-
Never use the machine after drinking alcohol or taking drugs.
Note: Following these tips keeps everyone safe and helps the snow sweeper brush work its best.
Signs to Replace Snow Brushes
Wear Indicators
A snow sweeper brush does not last forever. Over time, it shows clear signs that it needs replacing. People often spot these signs during regular checks. Here are some common wear indicators:
-
Uneven wear on the brush, with one side looking more used than the other. This can make the machine wobble and clean less effectively.
-
Broken or missing bristles. When bristles fall out or snap, the brush cannot pick up snow and debris as well.
-
The brush diameter becomes smaller than when it was new. A thinner brush means less contact with the ground and weaker cleaning.
-
More dust and debris left behind after sweeping. If the machine scatters more mess than before, the bristles may be too worn.
-
Streaks on the pavement or debris left along the edges. These marks show the brush is not making good contact with the surface.
-
Bristles that look flattened, frayed, or uneven. These bristles cannot sweep snow away properly.
Tip: Regularly check the brush for these signs. Early replacement keeps snow removal safe and efficient.
Performance Issues
Sometimes, the snow sweeper brush might look fine but still not work as it should. Performance problems often mean it is time for a new brush. Watch for these issues:
-
The machine takes longer to clear snow than it did last season.
-
It leaves streaks or misses patches of snow and debris.
-
The brush struggles with heavy or wet snow, clogging more often.
-
You need to go over the same area many times to get it clean.
-
Cleaning quality drops, and jobs take more time to finish.
When these problems appear, the brush is likely worn out. Replacing it helps the machine work better and keeps paths safe for everyone.
Replacing the Brush
Tools Needed
Before anyone starts, they should gather all the right tools. Having everything ready makes the job smoother and safer. Most manufacturers suggest these items:
-
Impact wrench with deep socket or open-ended wrench (sizes: 1/2” for hydraulic hose clamps, 3/4” or 19mm for motor nuts, 9/16” for bearing end caps and bolts)
-
Replacement wafers (the new brush sections)
-
Step ladder for reaching higher parts
-
3/16 Allen wrench
-
Punch and hammer
-
Crowbar
-
Floor jack
-
Tape measure
Tip: Lay out all tools in advance. This helps avoid delays and keeps the work area tidy.
Steps
Replacing a snow sweeper brush might look tricky, but breaking it down into steps makes it easier. Here’s a simple guide:
-
Find a flat, safe place to work. If possible, use a hoist or forklift to stand the brush core upright.
-
Gather all the tools listed above.
-
Start on the passenger side, which is opposite the motor.
-
Use the Allen wrench to loosen the lock collar on the idler shaft bearing.
-
Take a punch and hammer to rotate and remove the lock collar. Clean it if it feels stuck.
-
Loosen the two bolts on the idler shaft bearing with a ratchet.
-
Let the brush and core drop off the frame.
-
Remove the idler bearing from the shaft.
-
Move to the driver’s side. Use a crowbar to push the brush off the drive motor. Pull it out from the passenger side.
-
Pull the whole core through so you can reach the old brush wafers.
-
Remove the old wafers. In the field, take off the end caps and pull each wafer off. In a shop, lift the core upright and remove the bell end caps on both sides.
-
Attach a metal loop to the core and use a forklift or hoist to lift it. The old wafers should fall off or can be removed by hand.
-
Stand the empty mandrel upright on a core stand.
-
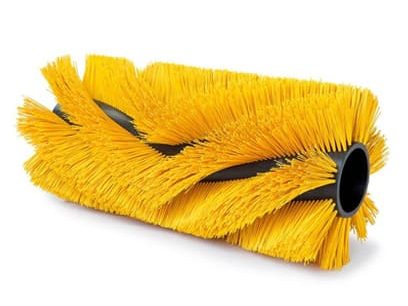
Install the new brush wafers. Make sure the drive pins fit into the core drive bars. Alternate poly and wire wafers for a snug fit.
-
Reinstall the retaining plate.
-
Carefully lay the core on the ground. Never use the wafers to move it.
-
Lower the brush head over the core. Push the core toward the motor end if needed to get past the side plates.
-
Reinstall the bearing mount plate and secure it with nuts.
-
Remove the 3/8″ bolt holding the drive adapter on the hydraulic motor.
-
Put a thin layer of grease on the motor splines.
-
Reinstall the drive adapter and hydraulic motor assembly. Secure them with nuts.
-
Reinstall the lead hoses in the hose clamps.
-
Double-check that the number of wafers matches the factory specifications before starting the machine.
Note: Take your time with each step. Rushing can lead to mistakes or damage.
Safety
Safety always comes first when replacing a brush. These steps help keep everyone safe:
-
Always turn off the engine and remove the key before starting. Wait until all moving parts stop.
-
Wear safety glasses or eye shields to protect your eyes from flying debris.
-
Keep children, pets, and bystanders away from the work area.
-
Put on gloves, hearing protection, a dust mask, long trousers, and slip-resistant boots.
-
Park the machine on a level surface. Disengage the PTO, set the motion-control levers to neutral-lock, and engage the parking brake.
-
Raise and support the A-frame with blocks or a cylinder lock.
-
Lower the broom kickstands.
-
Remove the stop assembly.
-
Disconnect and plug hydraulic hoses to prevent leaks.
-
Disengage the quick pin on the quick-attach assembly.
-
Use the machine’s hydraulics to lower the broom so it does not rest on the quick-attach triangle.
-
Move the broom hoses aside and back the machine out of the broom triangle.
-
Reinstall or safely store the stop assembly.
Remember: Following these safety steps helps prevent injuries and keeps the snow sweeper brush in good condition.
Maintenance Tips
Cleaning
Keeping a snow sweeper brush clean helps it last longer and work better. First, users should knock off any loose snow by tapping the brush gently against a hard surface. If dirt or salt builds up, they can wash the bristles with water and a mild soap, such as dish soap. A soft brush or cloth works well for scrubbing away grime. For a deeper clean, soaking the bristles in a mix of water and vinegar for half an hour removes bacteria and odours. After cleaning, they should rinse the brush with clean water and let it air dry. Hanging the brush or placing it in a dry spot stops mould from growing.
Tip: Never use harsh chemicals or hot water. These can damage the bristles and shorten the life of the brush.
Storage
Proper storage keeps the snow sweeper brush in top shape. People should always store the brush in a dry, covered area, away from rain and snow. Sunlight can weaken the bristles, so using a cover or storing the brush indoors is best. The bristles should not touch the ground or carry any weight. Some brushes come with stands to keep the bristles off the floor. Covering the equipment also stops dust and debris from building up. Users should always keep the brush away from heat sources and open flames, as high temperatures can warp or melt the bristles.
Inspection
Regular checks help spot problems early. Users should look at the bristle length and replace the brush if the bristles wear down to less than two-thirds of their original size. They need to watch for uneven wear, curling, or fraying. Checking the broom’s alignment makes sure it touches the ground evenly. All bolts and mounting parts should feel tight, with no loose movement. If the brush vibrates or makes odd noises, it might need attention. Removing any tangled debris keeps the brush spinning freely. Comparing the brush to the manufacturer’s guide helps decide when to replace it.
|
Broom Type |
What to Check |
When to Inspect |
|---|---|---|
|
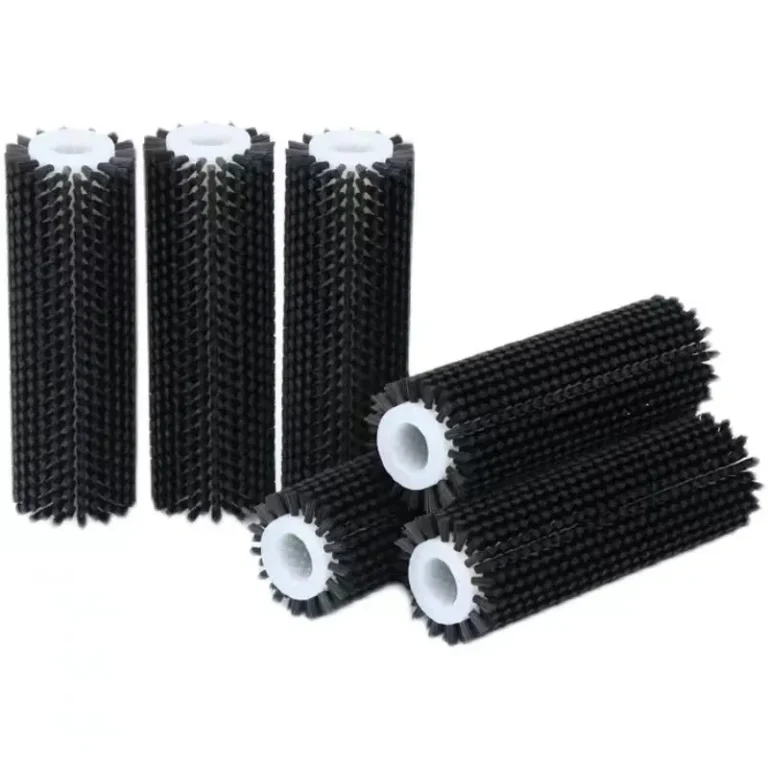
Tube Brooms |
Bristle wear, moving parts, damage |
Spring, Autumn |
|
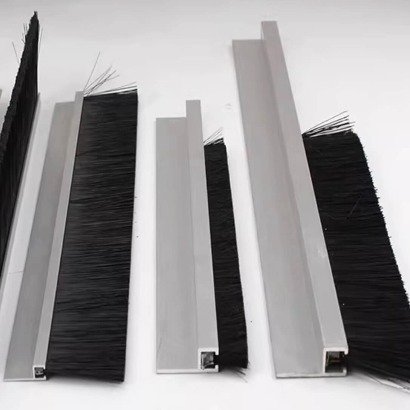
Strip Brooms |
Bristle wear, bolts, damage |
Spring, Autumn, Winter |
|
Wafer Brooms |
Bristle length, damage, lubrication |
Spring, Autumn |
|
All Brooms |
General inspection and storage |
All Seasons |
Note: Regular cleaning, safe storage, and careful inspection keep the snow sweeper brush working well all winter.
Doing regular checks, cleaning, and replacing parts on time helps equipment work well.
-
Clean the brush after every use to stop dirt from building up.
-
Oil and check the parts so they do not wear out.
-
Keep your equipment in a dry place.
If you follow these steps, you can clear snow safely and quickly all winter.
FAQ
Q1: What is the typical service life of a commercial snow sweeper brush?
Commercial snow sweeper brushes typically last one to three seasons depending on usage intensity, snow conditions, and maintenance practices. Regular inspection helps determine optimal replacement timing for specific applications.
Q2: Can snow sweeper brushes be used on delicate surfaces like paver stones?
Yes, selecting brushes with appropriate bristle stiffness prevents surface damage. Soft nylon bristles work well on decorative pavers, while stiffer options suit concrete and asphalt surfaces.
Q3: How should municipalities budget for snow sweeper brush replacement?
Most municipalities plan for annual brush replacement or budget for multiple brushes per season during heavy snow years. Tracking usage hours helps predict replacement needs accurately.