To use a tube brush, choose the right size, insert it gently, and scrub the inside of the tube with a twisting motion. The right tube brush keeps laboratory glassware clean and safe by removing residue without causing scratches. People should always select the correct brush, check the tube, clean thoroughly, rinse well, and care for the brush after use. Using the proper method helps protect both equipment and results.
Key Takeaways
-
Choose the right tube brush size and material to clean effectively without damaging tubes.
-
Inspect tubes carefully before cleaning to avoid using damaged or contaminated glassware.
-
Use a gentle twisting motion when scrubbing inside tubes to remove residue safely.
-
Rinse tubes thoroughly with distilled water after cleaning to prevent contamination.
-
Wear proper protective gear like gloves and goggles when handling chemicals and brushes.
-
Clean and dry tube brushes after each use to keep them in good condition and ready.
-
Replace brushes when bristles wear out or handles get damaged to maintain cleaning quality.
-
Use specialized brushes and techniques for curved tubes, metal tubes, and delicate glassware.
Tube Brush Selection
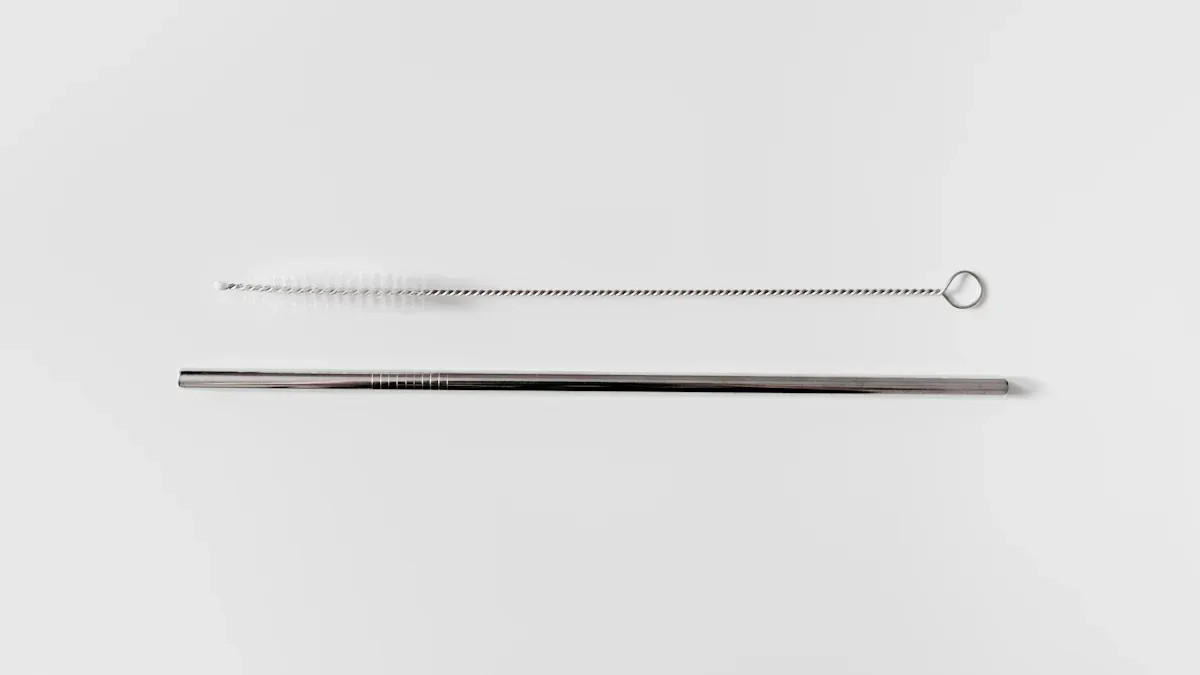
Choosing the right tube brush makes cleaning much easier and safer. The right brush helps remove residue without scratching or damaging the tube. Here’s how to pick the best one for your needs.
Types
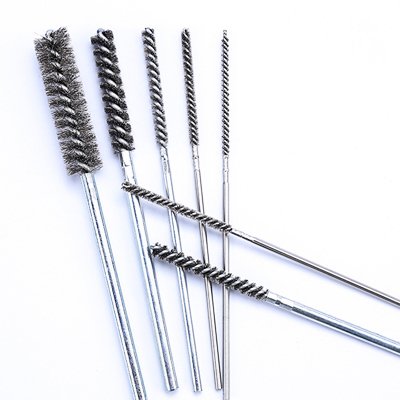
Many types of tube brushes exist for different cleaning jobs. Each type works best for certain tasks. Here are some common types:
-
Double-stem tube brushes: These brushes have extra durability and work well for tough cleaning jobs.
-
Side-action brushes: These brushes use stiff stems and are good for heavy-duty tasks.
-
Micro spiral brushes: These brushes clean small, narrow spaces.
-
Test tube brushes: These brushes clean test tubes, centrifuge tubes, and small jars.
-
Flask and cylinder brushes: These brushes fit the shape of flasks and cylinders to clean them thoroughly.
-
Pipet brushes: These brushes have tapered bristles for cleaning pipets.
-
Burette brushes: These brushes use strong wire and nylon bristles for effective cleaning.
-
Brass wire tube brushes: These brushes clean inside holes and offer good durability.
Each type has a special use. For example, test tube brushes work best for narrow glassware, while flask brushes handle larger openings.
Materials
The material of the brush affects how well it cleans and how safe it is for your equipment. Here are some common materials:
Natural fibers, like horsehair or plant fibers, offer gentle cleaning. They work well for delicate glassware and are biodegradable. Synthetic fibers, such as nylon, are strong, flexible, and resist chemicals. Nylon brushes clean well without scratching and can handle many cleaning agents. Metal fibers, like stainless steel or brass, provide extra scrubbing power. Stainless steel resists corrosion and works for heavy-duty cleaning. Brass bristles are softer and protect sensitive surfaces.
marshal Pipe Cleaning Brushes come in a range of materials to match different cleaning needs. The table below shows some features:
|
Feature |
marshal Pipe Cleaning Brushes Details |
|---|---|
|
Bristle Material |
Nylon, stainless steel, copper wire, abrasive wires, and natural fibers |
|
Handle Flexibility |
Flexible handles for easy maneuvering |
|
Chemical Resistance |
Excellent resistance, especially with nylon and stainless steel bristles |
Sizing
Picking the right size brush is important. The brush should fit snugly inside the tube but not be too tight. A brush that is slightly larger than the tube’s inside diameter cleans best. If the brush is too small, it will not clean well. If it is too large, it could get stuck or damage the tube.
To find the right size, measure the inside diameter of the tube. Choose a brush with a diameter just a bit bigger than this measurement. This ensures the bristles touch all sides of the tube for thorough cleaning. marshal offers brushes in many sizes, so users can find the perfect fit for any tube or glassware.
Tip: Always match the brush material and size to the tube or glassware. This helps prevent scratches and keeps equipment in good shape.
Preparation
Inspecting Tubes
Before cleaning, everyone should check each tube carefully. A good inspection helps prevent accidents and keeps glassware in top shape. Here is a simple process to follow:
-
Look closely at every tube for cracks, chips, or scratches. Even small flaws can cause problems during cleaning or later use.
-
Discard any tubes that show signs of damage. Damaged tubes can break easily and may contaminate samples.
-
Pour out any remaining contents with care. This step helps avoid spills and cross-contamination.
-
Sort tubes by sample type, such as hazardous, non-hazardous, or biological. Sorting helps choose the right cleaning and disposal methods.
-
Rinse each tube with distilled water or a suitable solvent to remove visible residue.
-
Label tubes with the sample type, date, and any special handling instructions. Clear labels help keep everything organized and traceable.
Regular inspection of tubes also means checking for signs of wear. Replace any tube that looks worn out. Store tubes in a clean, dry place to keep them free from contamination.
Gathering Supplies
Having the right supplies ready makes the cleaning process smoother and safer. Here is a checklist of what to gather before starting:
-
Tube brush in the correct size and material for the glassware
-
Cleaning agent, such as laboratory detergent or a mild soap
-
Distilled water or other rinsing solvents
-
Personal protective equipment (PPE): gloves, goggles, and a lab coat
-
Waste containers for hazardous and non-hazardous liquids
-
Labels and markers for organizing tubes
-
Paper towels or lint-free cloths for drying
Wearing PPE protects skin and eyes from splashes or contact with chemicals. Using the right tube brush ensures thorough cleaning without damaging the glassware.
Pre-Cleaning Steps
A few simple steps before scrubbing can make cleaning much more effective. Here is a recommended routine:
-
Finish all experiments and stop any ongoing reactions with the right reagents.
-
Put on gloves, goggles, and a lab coat before handling any glassware.
-
Neutralize strong acids or bases with suitable chemicals.
-
If biological material is present, add a diluted bleach solution and let it sit for about a minute to inactivate contaminants.
-
Pour hazardous liquids into the correct waste containers, not down the sink.
-
Rinse each tube three times with an alcohol-based solvent like acetone. Dispose of the first rinse in hazardous waste and the next two in the sink.
These steps help remove or neutralize dangerous substances and loosen residue. When it is time to use the tube brush, the glassware will be safer and easier to clean.
Cleaning with a Tube Brush
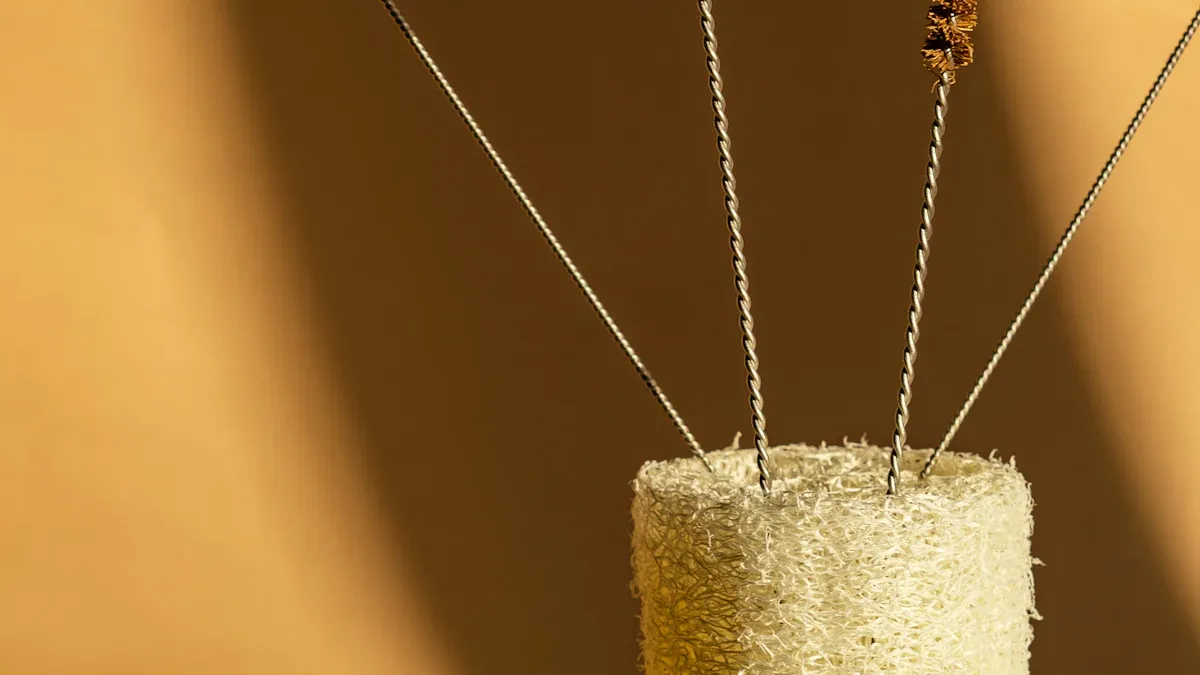
Inserting the Brush
Start by holding the tube securely in one hand. With the other hand, take the tube brush and gently insert it into the tube. Make sure the brush fits snugly but does not require force. If the brush feels too tight, choose a smaller size to avoid breaking the glassware. Always insert the brush straight and avoid bending the tube or the brush handle. This step helps prevent damage to both the tube and the brush.
Tip: For delicate glassware, use a brush with soft nylon or natural bristles. marshal offers options that protect sensitive surfaces while still removing residue.
Scrubbing Technique
A good scrubbing technique ensures every part of the tube gets clean. The right method removes stubborn residue and keeps glassware safe for future use.
Twisting Motion
Use a gentle twisting motion to scrub the inside of the tube. Hold the handle and rotate the brush while moving it up and down. This action helps the bristles reach all sides of the tube. Avoid using too much force, as this can scratch or break the glass. For tough spots, let the tube soak in warm soapy water or a specialized cleaning solution before scrubbing again.
Here is a simple process for effective scrubbing:
-
Insert the brush gently into the tube.
-
Twist the handle while moving the brush up and down.
-
Focus on areas with visible residue.
-
If stains remain, soak the tube in a cleaning solution, such as a mixture of water and laboratory detergent.
-
Repeat the scrubbing process as needed.
For grease or organic stains, use solvents like acetone or ethanol. For mineral deposits or stubborn stains, a mild acid solution may help. Always follow safety guidelines when handling chemicals.
Reaching All Areas
Make sure the brush reaches the bottom and all sides of the tube. Move the brush in and out several times, twisting as you go. For tubes with narrow necks or curved shapes, use a brush with a flexible handle. marshal designs flexible handles that help reach difficult spots without damaging the glassware.
If the tube has a rounded bottom, press the brush gently against the curve to clean it thoroughly. For very long tubes, use a brush with a longer handle to reach the entire length.
Note: Specialized brushes with adjustable heads or tapered bristles can help clean tubes with unusual shapes or hard-to-reach areas.
Rinsing
After scrubbing, rinse the tube thoroughly to remove all cleaning agents and loosened debris. Start with warm tap water to wash away most of the soap and dirt. Next, rinse the tube several times with distilled or deionized water. This step is important because tap water and household detergents can leave residues that affect experiments.
Follow these steps for proper rinsing:
-
Rinse the tube with warm tap water to remove visible debris and soap.
-
Fill the tube with distilled or deionized water, swirl it around, and pour it out.
-
Repeat the distilled water rinse at least two more times.
-
Check if the water forms a smooth sheet on the glass surface. If not, repeat the cleaning and rinsing steps.
-
For faster drying, rinse the tube with acetone and let it air dry on a clean rack.
Proper rinsing ensures no cleaning agent remains inside the tube. This step protects future samples from contamination and keeps glassware ready for use.
Tip: Always use detergents made for laboratory glassware. Avoid household soaps, as they may leave residues that interfere with experiments.
marshal’s nylon bristles resist chemicals and work well with both soapy water and specialized cleaning solutions. This makes them a reliable choice for routine and deep cleaning tasks in the lab.
Special Cases
Glassware
Cleaning delicate glassware requires extra care to prevent scratches or breakage. Many people find that following a careful process helps keep glassware in top condition. Here are some important steps:
-
Choose a soft, non-abrasive brush, such as one with nylon or natural bristles. Avoid wire brushes or brushes with exposed wire cores, as these can scratch the glass and create weak spots.
-
Clean glassware soon after use. If immediate cleaning is not possible, soak the glassware in water to prevent residue from hardening.
-
Rinse the glassware first with tap water to remove cleaning agents, then follow with distilled or deionized water to ensure no residue remains.
-
Dry glassware by placing it upside down on a rack or pegboard. This method helps prevent damage and allows for thorough drying.
-
Inspect each piece for chips, cracks, or scratches before reuse. Discard any damaged glassware to avoid accidents.
marshal offers soft nylon and natural bristle options that protect fragile surfaces. Their flexible handles make it easy to reach all areas without applying too much pressure.
Metal Tubes
Metal tubes often require a different approach. The right brush design and material can make cleaning more effective and safe. The table below compares common brush types for metal tubes:
|
Brush Series |
Stem Flexibility |
Diameter Range |
Key Features and Use Case |
|---|---|---|---|
|
Flexible Series |
Highly flexible |
1/4″ to 1-1/4″ |
Cleans straight and curved tubes; adapts to bends without scratching |
|
Standard Series |
Semi-flexible |
3/4″ to 2-1/2″ |
Good for pipes with gradual bends; comfortable grip |
|
Rigid Series |
Rigid |
3/4″ to 3″ |
Best for straight tubes needing strong scrubbing |
|
Double Leader Series |
Push-pull design |
Various |
Effective for food service and dispensing machines |
These brushes use non-scratch, metal-free polypropylene fills. They resist chemicals and allow for aggressive cleaning without damaging the tube. marshal provides a range of bristle materials, including steel, nylon, and brass, so users can match the brush to the cleaning task and tube material.
Curved Tubes
Curved tubes and tubing with bends present unique cleaning challenges. Specialized brush designs and techniques help reach every part of the tube. Consider these tips:
-
Use hook bottle brushes with a curved or angled shape to clean around bends and U-shaped tubes.
-
Select brushes with long, flexible handles and stiff bristles to reach elbows and valves in complex piping.
-
Match the brush diameter closely to the tube’s inner diameter for effective cleaning without causing damage.
-
Choose bristle stiffness based on the tube material and the type of residue. Soft bristles work well for delicate surfaces, while stiffer bristles remove tough deposits.
-
Look for brushes made with corrosion- and rust-resistant materials for durability.
marshal features flexible construction with spring steel wire cores and nylon coatings. This design adapts to curves without kinking or damaging the tube. Tapered bristles and ergonomic handles help users clean tubes of different sizes and shapes, making the process easier and more effective.
Safety and Care
Avoiding Damage
Proper technique helps protect both the cleaning brush and the equipment. Users should always inspect the brush before each use. Look for bent wires, frayed bristles, or any signs of wear. Replace the brush if the bristles show more than 30% wear or if the handle is damaged. When cleaning, avoid using too much force. Excessive pressure can scratch glassware or deform the brush. Select a brush that fits the tube snugly but does not require force to insert. For best results, rinse the brush after each use and hang it to dry. This prevents bristle deformation and keeps the brush in good condition—store brushes in a clean, dry place to avoid contamination.
Tip: Always use the correct brush size and material for the tube. This simple step prevents scratches and extends the life of both the brush and the equipment.
Handling Chemicals
Working with chemical cleaning agents requires careful attention to safety. Before starting, users should put on gloves, safety goggles, and a lab coat. Remove jewelry and watches to prevent glove damage. Keep fingernails short and free of polish. Choose chemical-resistant gloves, such as nitrile or latex. Make sure the cleaning area has good ventilation. Open windows or use a fume hood if possible.
Here are important steps for safe chemical handling:
-
Wear appropriate personal protective equipment, including gloves, goggles, and protective clothing.
-
Increase ventilation and close doors to prevent the spread of vapors or dust.
-
Neutralize acids and bases with the correct neutralizing agents.
-
Contain spills by creating a barrier and use absorbent materials to soak up liquids.
-
Collect residues in labeled containers for proper disposal.
-
Dispose of chemical waste separately from regular trash, following hazardous waste guidelines.
-
Decontaminate all equipment and surfaces after cleaning.
Always follow the manufacturer’s instructions for cleaning agents. Never mix chemicals unless the instructions say it is safe. Wash hands before and after wearing gloves.
Preventing Injury
Safety during cleaning protects everyone in the lab. Operators and anyone nearby should wear safety goggles or face shields that meet ANSI standards. Closed-toe, rubber-soled shoes help prevent injury from spills or dropped glassware. Before using a brush, check for damage or rust. Never use a damaged brush. Secure the brush properly if attaching it to a machine. Run the brush at the recommended speed and keep hands clear during operation.
Best practices for injury prevention include:
-
Control brush speed based on tube size. Use lower speeds for larger tubes.
-
Avoid applying too much pressure. Let the brush do the work.
-
Inspect brushes regularly for wear or damage.
-
Replace brushes when cleaning efficiency drops or bristles become worn.
-
Store brushes in a dry, clean location.
-
Use respiratory protection if dust or fumes are present.
-
Follow all safety instructions and local regulations.
By following these steps, users can keep both themselves and their equipment safe during every cleaning session.
Brush Maintenance
Cleaning the Brush
After each cleaning session, users should always clean the tube brush to keep it in top condition. Rinsing the brush right after use removes any leftover detergent, chemicals, or debris. For best results, they can follow these steps:
-
Rinse the brush under warm running water to wash away loose particles.
-
Use a mild laboratory detergent if the brush has stubborn residue.
-
Gently scrub the bristles with another clean brush or gloved fingers.
-
Rinse again with distilled water to remove any soap or chemical traces.
-
Shake off excess water and let the brush air dry.
For nylon-bristled brushes, users can sterilize them in an autoclave if needed. This step is especially helpful in laboratory settings where sterility matters. Natural fiber brushes should not go into an autoclave, so users should always check the manufacturer’s guidelines before sterilizing.
Tip: Cleaning the brush right after use prevents residue from hardening and makes the next cleaning job easier.
Storage
Proper storage helps extend the life of any tube brush. Users should always store brushes in a clean, dry place. Hanging the brush by its handle or placing it on a rack keeps the bristles straight and prevents them from bending. If possible, store brushes upright with the bristles facing down. This position allows water to drain away and keeps the brush dry.
A simple storage checklist includes:
-
Keep brushes away from direct sunlight and heat sources.
-
Store brushes separately to avoid cross-contamination.
-
Use a covered container or drawer for brushes used with hazardous materials.
-
Make sure brushes are completely dry before storing to prevent mold or bacteria growth.
A clean storage area also protects the brush from dust and other contaminants. Regularly wiping down the storage space keeps everything sanitary.
Replacement
Even with good care, every tube brush will eventually need replacement. Users should inspect their brushes often and look for these signs:
-
Bristles appear frayed, bent, or worn down.
-
The handle shows signs of rust or breakage.
-
Wires inside the brush start to break or poke through.
-
The brush no longer fits snugly in the tube or cleans as well as before.
Manufacturers do not set a fixed schedule for replacing brushes. Instead, they recommend checking the brush’s condition after each use. Using the correct brush size and applying gentle pressure helps the brush last longer. Excessive force can cause wire breakage and shorten the brush’s life.
By following these steps, users can keep their cleaning tools in great shape and ensure every tube brush delivers the best results.
Troubleshooting
Stubborn Residue
Sometimes, residue just will not come off, even after a good scrub. When this happens, users can try a few extra steps to get glassware clean. First, soaking the tube in warm, soapy water for at least 30 minutes can loosen dried or sticky deposits. If the residue remains, a specialized laboratory detergent or a mild acid solution may help. For organic stains, a solvent like acetone or ethanol works well. Users should always rinse the tube thoroughly after using any chemical. For mineral deposits, a vinegar or diluted acid soak can break down the buildup. After soaking, scrubbing again with the brush often removes the last bits of residue. If stubborn spots still remain, repeating the process or using a brush with slightly stiffer bristles may help. Always check that the brush material matches the tube to avoid scratches.
Tip: Never use sharp objects to scrape residue. This can damage the tube and make cleaning harder next time.
Stuck Brush
A brush can sometimes get stuck inside a tube, especially if the fit is too tight or residue builds up. Here is a step-by-step guide for safely removing a stuck brush:
-
Try pushing the brush further into the tube. This can flip the bristles and make pulling it out easier.
-
Use a tool, such as a screwdriver, to gently bend the bristles downward. This reduces resistance.
-
If possible, clip or cut some bristles to lessen friction.
-
If the brush will not come out, push it all the way through the tube and pull it out from the other end.
-
For long or complex tubes, consider removing a section of the tube if accessible.
-
Use mechanical tools, like a slide hammer or a custom puller, for extra leverage.
-
Always avoid using too much force, especially with flexible liners, to prevent damage.
-
Twisting the brush to match the grooves inside the tube can also help free it.
Patience and gentle handling protect both the brush and the tube from damage.
Preventing Build-Up
Recurring build-up inside tubes can cause cleaning problems and reduce equipment efficiency. Regular maintenance and the right technique help prevent these issues. The table below lists common problems and solutions:
|
Problem / Issue |
Explanation |
Recommended Solution |
|---|---|---|
|
Using the wrong brush size or material |
Can lead to poor cleaning or tube damage |
Measure tube diameter carefully; select a brush slightly larger; match bristle type |
|
Neglecting regular replacement or cleaning |
Causes fouling, blockages, and loss of efficiency |
Replace brushes as soon as bristles wear out; clean after every use |
|
Infrequent cleaning schedule |
Allows residue to harden and build up |
Set a regular cleaning schedule based on usage and type of residue |
A good routine includes inspecting tubes and brushes before each use, cleaning immediately after use, and replacing brushes every few months or when bristles show wear. Users should always follow manufacturer guidelines for cleaning and maintenance. This approach keeps equipment in top shape and reduces the risk of recurring problems.
Cleaning laboratory glassware safely and effectively starts with choosing the right brush, using careful technique, and maintaining equipment after each use. Proper handling, regular inspection, and clean storage help extend the life of glassware and reduce contamination. Following manufacturer guidelines and wearing protective gear keep everyone safe. When users pay attention to these details, they create a cleaner, safer lab environment and protect their results for the long term.
FAQ
How does someone choose the right tube brush size?
They should measure the inside diameter of the tube. Then, select a brush with a diameter just slightly larger. This ensures the bristles touch all sides for effective cleaning. A snug fit works best, but the brush should not feel tight or hard to insert.
Can a tube brush clean both glass and metal tubes?
Yes, a tube brush works for both glass and metal tubes. They should pick soft bristles for glass to avoid scratches. For metal, stiffer bristles remove tough residue. Flexible handles help reach all areas in both types of tubes.
How often should someone replace a tube brush?
They should inspect the brush after each use. Replace it when bristles look frayed, bent, or worn down. If the brush no longer cleans well or the handle shows damage, it is time for a new one. Regular replacement keeps cleaning effective.
What cleaning agents work best with tube brushes?
Laboratory detergent or mild soap works well for most cleaning tasks. For stubborn stains, they can use acetone, ethanol, or a mild acid solution. Always check that the brush material resists the chosen cleaning agent to prevent damage.
Is it safe to autoclave a tube brush?
Nylon-bristled tube brushes can go in an autoclave for sterilization. Natural fiber brushes should not be autoclaved, as heat may damage them. Always follow the manufacturer’s guidelines for sterilizing and cleaning the brush.
What should someone do if residue remains after brushing?
They should soak the tube in warm, soapy water or a suitable solvent. After soaking, scrub again with the tube brush. For tough deposits, repeat the process or try a brush with slightly stiffer bristles. Always rinse thoroughly after cleaning.
How can someone prevent tube brushes from getting stuck?
They should always choose the correct brush size. Insert the brush gently and avoid forcing it. If resistance increases, switch to a smaller brush. Regular cleaning prevents residue build-up, which can cause brushes to get stuck inside tubes.
How should tube brushes be stored after use?
After cleaning and drying, store tube brushes in a clean, dry place. Hanging them by the handle or placing them on a rack keeps bristles straight. Separate brushes used for different tasks to avoid cross-contamination and keep them ready for the next use.